Building a barndominium is no small task, and if you’re hoping to build one in the future, this Barndominium building checklist can help you along the way.
Whether you’re acting as your own contractor or managing the whole thing through an outside construction company, building a barndominium successfully will require a number of different steps to complete.
If this is your first self-build project or the first time you’ve built something of this scale, you might find the number of things to consider a little overwhelming.
In this post, we’ll hope to change all of that!
This barndominium building checklist will give you a clear path from your initial idea to a finished home.
Use this checklist to map out a plan for your project, and you’ll be able to enjoy a smooth and hassle-free build!
What are the Steps in Building a Barndominium?
Though there are many number of ways that the steps of building a barndominium can be divided, for the purposes of most builds, you can think of the process as fitting into 6 main stages:
- Planning and Land
- Foundation
- Framing
- Wiring, Plumbing and HVAC
- Insulation
- Drywall, Paint and Flooring
What to Know Before Building a Barndominium
Building a barndominium, like any other self-build project, requires a certain amount of forward planning before you get started. The regulations around building in your state, the personal needs you’ll need to bear in mind when selecting a floor plan, and how much your barndo is going to cost, are all important considerations to bear in mind before you commit to building your barndominium.
Though there’s too much to cover fully in a single article, Barndominium Homes is full of handy resources to help you lay the groundwork for your barndominium plans. Be sure to check out our other guides as you navigate the key decisions for your project!
Can I Build a Barndominium Myself?
Short answer – yes!
Going the DIY route and building a barndominium yourself will save you a huge amount of money and is often the most fulfilling way to make your barndominium ideas a reality. Having said that, it’s not a decision that should be taken lightly.
DIY barndominium building requires both the physical health to carry out demanding tasks like roofing, bricklaying, and groundworks, as well as the skills and experience required for things such as plastering, plumbing, and electrical work.
Knowing whether you’ll take a hands-on role in your build, whether large or small, will require a keen understanding of various stages and requirements of building a barndo.
As you move through this checklist, consider the implications of each stage in the process, and how much hands-on involvement you can feasibly have in it.
For more information, be sure to check out the helpful resources in our Barndominium FAQs!
How Long Does it Take to Build a Barndominium?
In terms of actual construction, the majority of barndominiums can be built within 6 months compared to a standard home’s 9 when the correct resources are in place. However, working to this timeframe and sticking to it requires a lot of preparation, effective coordination with subcontractors, and a thorough understanding of the requirements in each stage of the build.
Most good contractors will be able to give you a clear timeframe that they can commit to, but certain crucial details of the build need to be on hand from day one.
How to Build a Barndominium Step-by-Step
Step 1: Planning and Land
The first essential step to building a barndominium is finding suitable land that you wish to purchase if you don’t own it already. Just like if you were buying a pre-built home, you should begin your search for a plot online.
Occasionally, you’ll be able to find a plot on a standard property site like Zillow, but there are also a number of sites which are specifically set up for buying and selling vacant land, such as Landhub.
As you browse the land and start to build a shortlist, be sure to check the zoning of the properties and research the timeframes and costs involved with changing the zoning if necessary.
It’s also a good idea to research any known issues people have faced when building new properties in the area, as you may need to test the soil for contaminants, and check localized building advice to protect your barndo from natural hazards like floods and earthquakes.
This is also a good stage to review the floor plan of the barndo itself, think about the planned details, and consider whether all of these details are practical when you try to line them up with the location, permits, and other details.
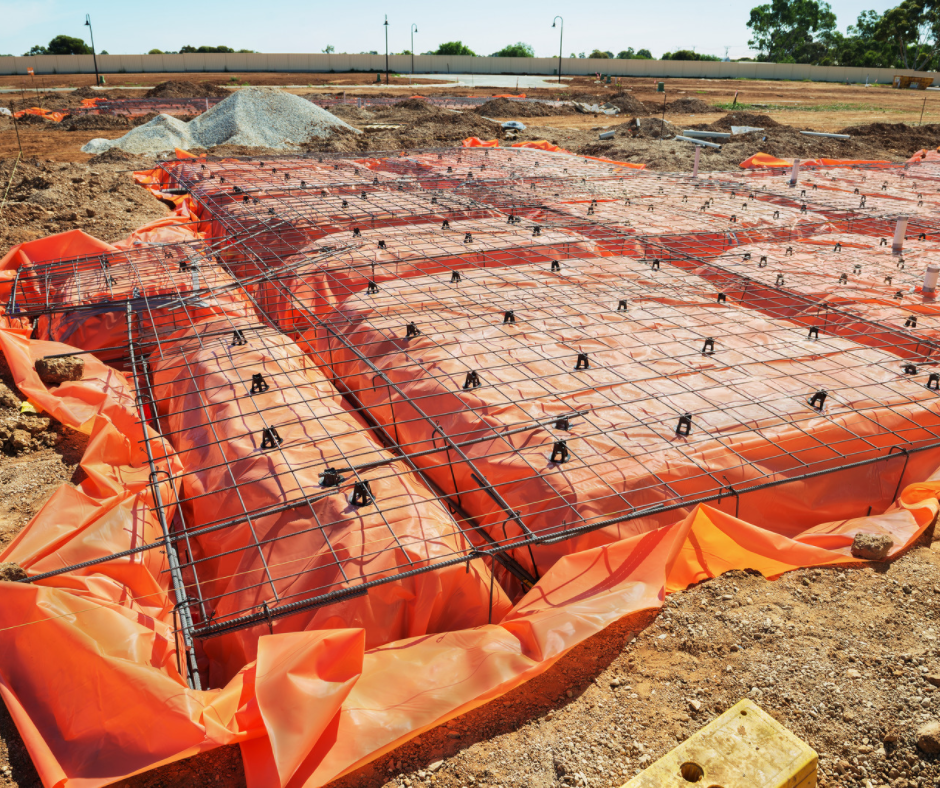
Step 2: Foundation
There’s a few ways to lay the foundations of a barndominium, but the most common is through posts which will be secured to the ground using concrete.
Post hole diggers are used to dig holes mapping out the area of the building and a predetermined depth, then fitted with cardboard forms.
The posts which will make up the bare bones of your barndo will then be placed into the forms and concreted in place. As the steel posts offer a lot more strength and resistance than wooden ones, this kind of framing lends itself to airy, open-plan designs without the need for load-bearing walls.
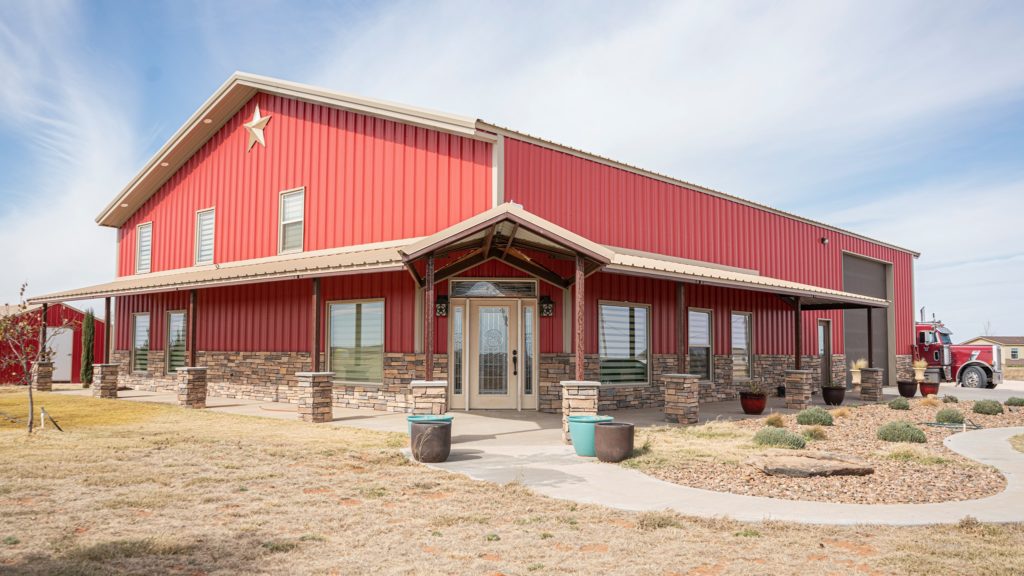
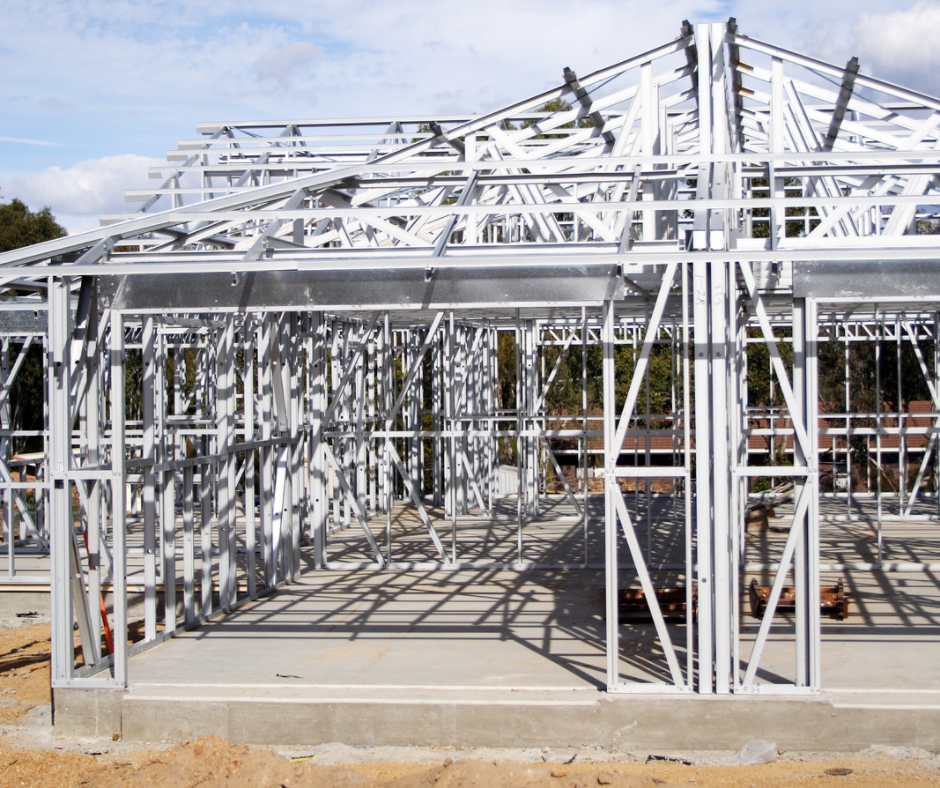
Step 3: Framing
Once the posts are in place, the rest of the frame can be set up. Though wood and metal can be used in different places here, many barndominiums employ heavy steel girders in this stage of the construction, which will require the use of a crane.
Interior framing is usually made using wooden timbers, as this makes it easier to install other components such as drywall and insulation.
As we mentioned before, the layout of your floor plan’s framing will often reduce the need for load-bearing walls, giving you more flexibility when making certain design choices regarding the interior.
With many barndominium floor plans, you’ll find that a large portion of the plan is taken up by wide-open spaces which can be divided by partition walls according to your preference.
The barndominium’s roof, gutters, and other weather shielding, are generally set up during this stage too.
Step 4: Wiring, Plumbing, and HVAC
Next are the modern amenities that make a home livable.
If you’re contracting the building yourself, you’ll need to know the order in which you’ll want to call in your various contractors.
Ideally, you’ll want to install the plumbing before the electrical circuitry, as the water supply, waste pipes, and drainage will need to run through holes that are already present in your barndo’s studs and framing.
While it’s possible for plumbers, electricians, and other contractors to work simultaneously, this isn’t the done thing and will often lead to unnecessary confusion.
HVAC systems offer a lot more flexibility in the way they can be installed, and can usually be installed after the bulk of the work is done. With this in mind, any HVAC you’re planning to install should be left until last.
Step 5: Insulation
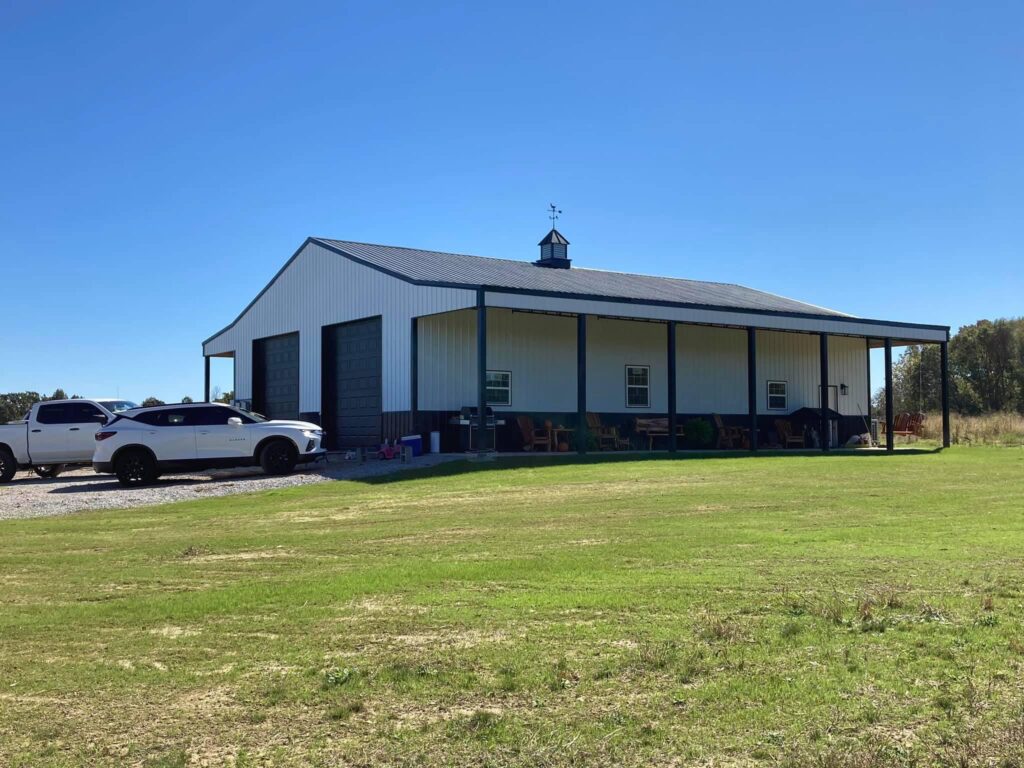
Though steel buildings require relatively little maintenance and are generally quite affordable, they do become hot in the summer and cold in the winter.
Because barndominiums are very popular in the southern states, where the climate often means that insulation isn’t a huge priority in newbuilds, it can be hard to know exactly how you should approach insulation when building a barndominium.
Rest assured, insulation is a must for barndominiums, and with its relatively thin, steel walls and roof, if you don’t install quality insulation in your build, you may find the finished home very uncomfortable to live in.
For more information on insulating your barndominium, we have a handy, comprehensive guide to finding the right insulation for your barndo here!
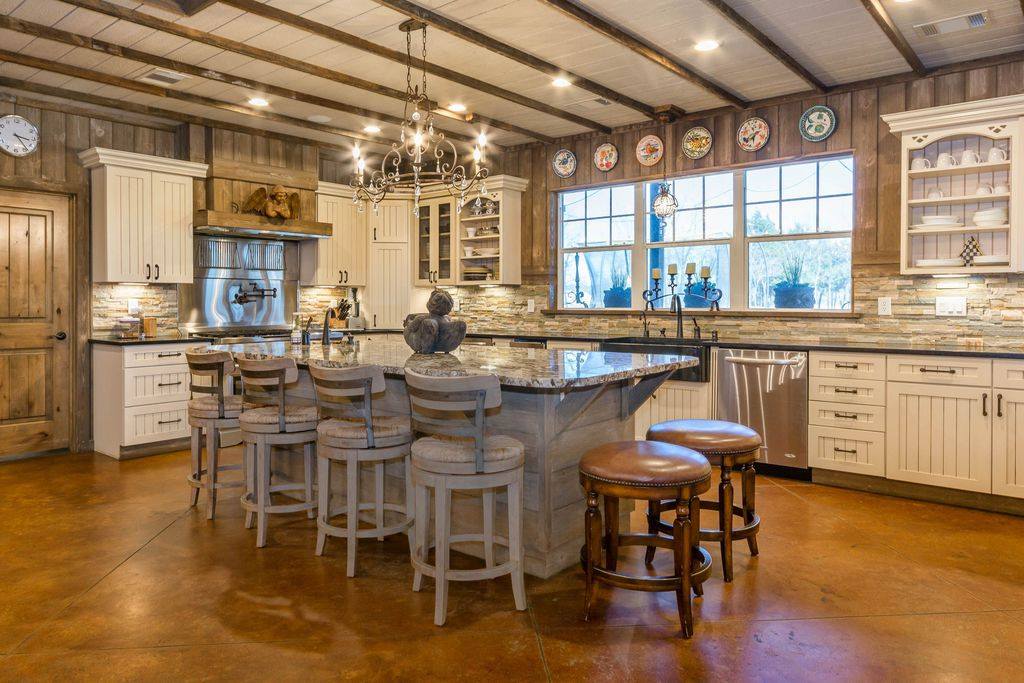
Step 6: Drywall, Paint, and Flooring
Once all the functional essentials are in place, you’ll need to install the wall covering.
With a classic, “country living” barndos, this tends to be drywall, but that’s certainly not your only option here. Masonry, timbers, and tongue and groove paneling are all options to consider and will give your barndo a unique sense of character that’s rarely seen in the more “template” designs.
Finally, you have the flooring. Like any new build, there are a lot of different flooring options you can choose from here, and you’ll have a great opportunity to make the decision based on your family lifestyle, budget, and aesthetic preferences.
Natural stone, tile, vinyl, and wood are all popular options when choosing barndominium flooring. Take a look at finished barndominiums online and what’s available through suppliers in your area, and find the floor that’s best for you!
18-Month Pre-Building Checklist
We hope you’ve found this barndominium building checklist helpful as you plan out your barndo build and navigate the path to a finished home.
For a more granular roadmap for your barndominium build, here’s a handy 18-month pre-building checklist you can use to determine a timeframe for your build and keep the whole project running smoothly.
18 months before breaking ground
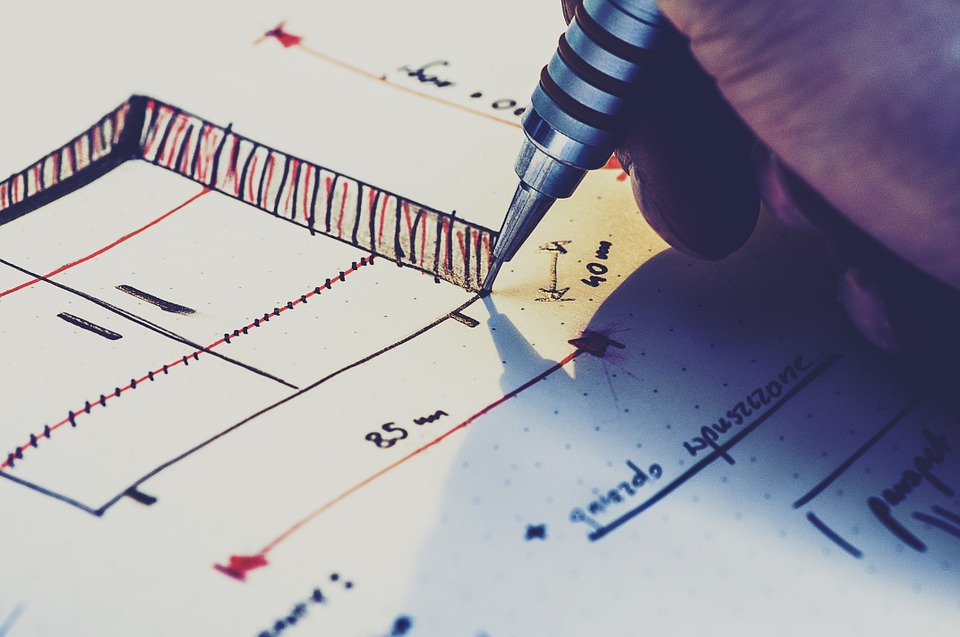
Complete plans for your new dream barndo
Collect and organize all your ideas to the smallest detail
Settle on a size and floor plan i.e. 40×60, 3 BR 2 BA, 1400 sq ft interior w 1000 sq ft shop & 10-ft wrapround porch, 2 sides
Finalize a sketch of your floor plan or print out a copy from your home design
software program. Here are some of the best options for home design software.
Decide for certain where you want your home site to be
Try to make sure before you buy land that local codes and regulations allow
your plan
Check preliminarily with county officials there about codes and zoning
Before you buy a parcel of land, make sure it will “perk,” or drain well. This will be essential for the creation of a good septic field
1 year before breaking ground
Contact county officials to get building permit paperwork
Meet with the architect or home designer about creating full blueprints
10 months before breaking ground
Finalize all building permits (this may take several weeks)
4 months before breaking ground
Begin looking for materials and subcontractors
3 months before breaking ground
Put up an address sign on your homesite
Have electrical power run to a temporary utility pole on the site perimeter
Have someone dig your well
2 months before breaking ground
Choose your subcontractors — companies and individual tradespeople
Tentatively schedule the following:
-Excavation
-Foundation work
-Concrete and gravel supplier
-Concrete finishers
-Framers (interior only if you’re erecting a metal building)
-Truss supplier (not needed for a metal building)
-Lumber/materials supplier
-Window and door supplier
1 month before breaking ground
Decide on subcontractors
Tentatively schedule the following:
-Electrician
-Plumber
-HVAC contractor
-Roofer (if not a metal barndo)
1 week before breaking ground
Make copies of blueprints
Gather and organize paperwork, tools, etc.
Check with the company preparing and pouring the slab and/or erecting the metal structure
Get ready to be at your homesite just about every day for the next few weeks
Put stakes on the lot to outline your barndominium
1 day before ground breaking
Call your excavator
Plan to be at your homesite for whatever time is necessary
As your first official act as on-site Owner-Builder, pack a bag to take with you
Include pencils, paper, measuring tape, calculator, snacks, water, sunscreen, a camera, and gloves
Ground breaking day
Be there early
Take pictures
Be prepared
Stay as long as you are useful
It is also important to remember first to find a company that will provide financing for your build and to secure your barndominium insurance.